Your asphalt driveway or private road takes a beating, especially with our Pacific Northwest weather. Rain, freeze-thaw cycles, and just plain old use can lead to cracks, potholes, and crumbling edges. Before you panic and think you need a whole new driveway, let's talk about what you can realistically fix yourself and when it's time to call in the cavalry.
Before You Start: Assess the Damage
First things first, take a good look at your asphalt. Not all damage is created equal. You're looking for a few common culprits:
- Hairline Cracks: These are thin, often spiderweb-like cracks. They're usually superficial but can widen if left alone.
- Larger Cracks: These are wider, deeper cracks, sometimes connecting to form a block pattern (alligator cracking). These are more serious.
- Potholes: These are depressions or holes where the asphalt has completely broken away. They can range from small divots to craters.
- Faded Surface: The asphalt looks gray, not black, and the aggregate (the small stones) might be visible. This indicates surface wear and oxidation.
For hairline cracks and a faded surface, you've got some good DIY options. For anything larger or deeper, you're probably looking at a job for us or another professional.
DIY Asphalt Repair: What You Can Tackle
You'd be surprised what a little elbow grease and the right products can do for minor asphalt issues. Here's what I recommend for homeowners:
Crack Filling (Small Cracks)
If you've got those thin, non-structural cracks – say, less than a quarter-inch wide – you can definitely tackle these. You'll need a good quality asphalt crack filler, often found at your local hardware store. Look for a pourable or squeeze-bottle type. Make sure the crack is clean and dry. Use a wire brush to get any loose debris out, then blow it clean with compressed air or even a leaf blower. Follow the product instructions carefully; usually, you just fill the crack slightly above the surface, and it'll settle. Do this on a warm, dry day so the material cures properly.
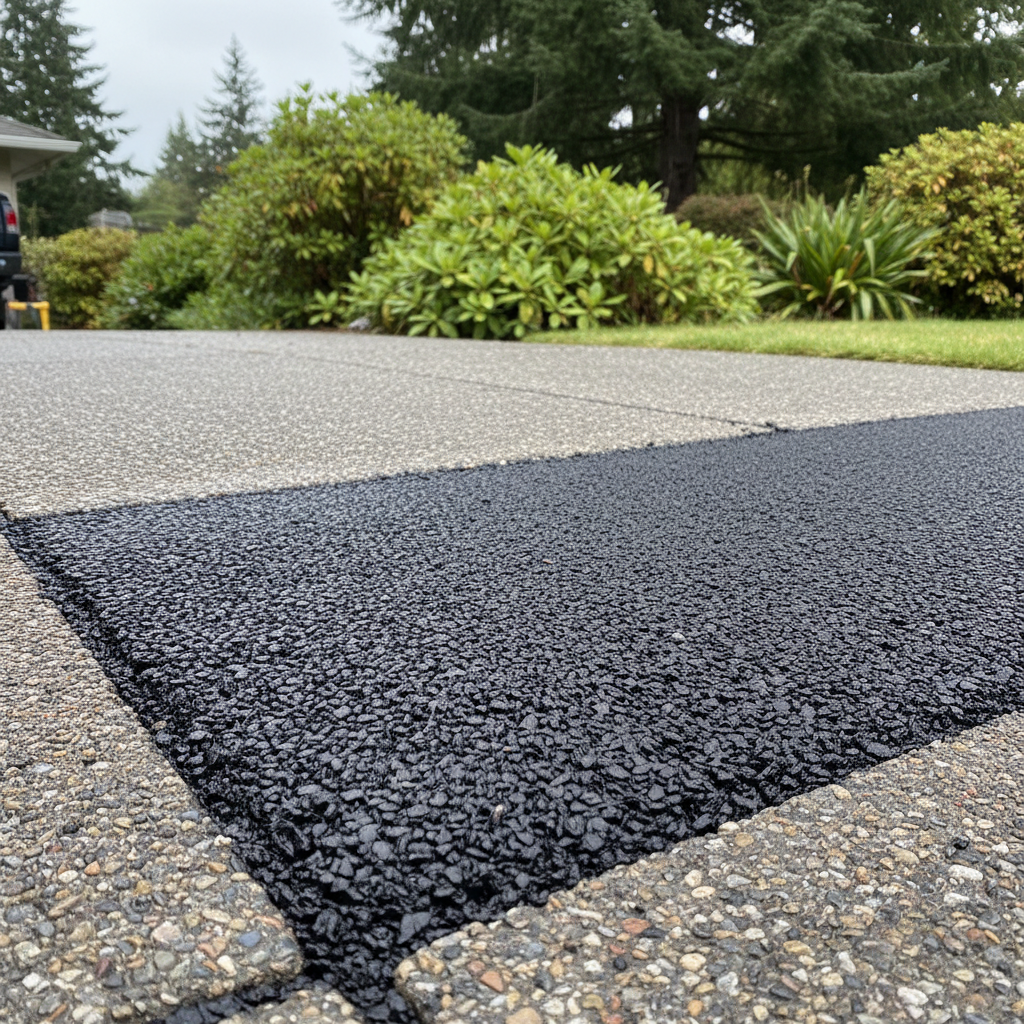
Sealcoating (Surface Protection)
This is probably the biggest DIY asphalt project you can do, and it's mostly preventative maintenance. If your asphalt is looking faded, gray, and a bit dry, a good sealcoat can bring it back to life and protect it from UV rays and water penetration. It's like sunscreen for your driveway. You'll need to thoroughly clean the surface first – power washing is great, but make sure it's completely dry before applying. You can buy sealcoat in 5-gallon buckets. Apply it with a squeegee or a special sealcoat brush. It's a workout, and you'll want to do it on a warm, overcast day to prevent it from drying too fast. Just be prepared for a strong odor for a day or two.
When to Call a Pro: Leave it to Paradise Asphalt Solutions
Alright, so you've done what you can, or maybe the damage is just too much for a DIY fix. Here's when you absolutely should call in a professional like us:
- Large Cracks & Alligator Cracking: If cracks are wider than about half an inch, or if you see extensive 'alligator' patterns (lots of interconnected cracks), that's a sign of deeper structural issues. Simply filling these won't solve the underlying problem, and they'll just reappear. We'd likely need to rout and fill these properly, or even remove and replace sections.
- Potholes: While you can buy cold patch asphalt at the store, it's really a temporary fix. For a lasting repair, potholes need to be squared off, the base needs to be compacted, and hot asphalt applied and compacted. Cold patch just won't hold up, especially in high-traffic areas or during our wet Shoreline winters.
- Drainage Issues: If you've got standing water on your driveway after it rains, that's a problem. Water is asphalt's worst enemy. This usually indicates a grading issue that needs professional assessment and correction. Simply patching won't fix poor drainage.
- Heaving or Sunken Areas: If parts of your driveway are raised or sunken, it means there's an issue with the sub-base – the material underneath the asphalt. This requires excavation and rebuilding of the base, which is definitely not a DIY job. This is especially common in areas with poor soil conditions, like some of the clay-heavy spots we see around Richmond Beach.
- Extensive Damage: If more than 25-30% of your driveway is cracked, crumbling, or potholed, you're probably past the point of cost-effective DIY repair. At that point, you're looking at a significant investment in materials and time for a temporary fix. It might be more economical and certainly more durable to get a professional overlay or even a full replacement.
After the Repair: Keep it Maintained
Whether you DIYed a crack fill or we came in for a bigger job, maintenance is key to making your asphalt last. Keep it clean – sweep off debris, especially leaves and dirt that can hold moisture. Address any new small cracks as they appear. And remember that sealcoating every 2-3 years (after any necessary repairs) is your best friend for extending the life of your asphalt surface.
Don't be afraid to tackle the small stuff yourself; it's a great way to save a few bucks and keep your property looking good. But know your limits. When in doubt, or when the damage looks serious, give Paradise Asphalt Solutions a call. We're happy to come out, take a look, and give you an honest assessment of what needs to be done.